Only Administrator users can log on to System Administration. Your windows user account or Sage ID must be a member of the Administrators Group.
When you open System Administration, all users in the Administrators and Users groups specified during the installation for On Premise deployments or using the Sage ERP Online Services for Sage 200 Online, are displayed on the Manage User Lists. The core components are installed for you automatically.
Depending on how you are using Sage 200, you need to perform a series of tasks within System Administration before users can operate Sage 200 successfully.
The following guidelines will help you.
Note: There are different ways of performing the same task. For example, you can assign companies for users within Companies, or assign users for companies within Users.
Verify the users in the Manage User Lists screen. Sage 200 user accounts are created for each user listed.
This lists the Windows user accounts (On Premise deployments) or Sage IDs (Sage 200 Online) that are in the groups specified during the installation. These are created either in Sage ERP Online Services for Sage 200 Online or in Windows Active Directory for On Premise deployments.
For more information, see the relevant Deployment and Installation Guide.
To allows users to access workspaces, enter timesheets and expense claims, and authorise purchase orders via a web browser.
There are further various optional tasks, as follows, depending on your business requirements:
To integrate Sage 200 Online with SharePoint, set up SharePoint integration.
Note: On Premise deployments of Sage 200 integrate with SharePoint automatically. In Sage 200 Online, you cannot use the Excel integration module that is available in On Premise deployments even if you integrate with SharePoint.
You can upgrade system administration data from a v2013 On Premise deployment to Sage 200 Online v2013.
You can upgrade company data from an earlier On Premise deployment to a v2013 On Premise deployment.
You can migrate System Administration data from the old configuration database to the new from versions 2009, 2010 and 2011. If you are upgrading from pre v2009, refer to your Business Partner for assistance.
Match your windows user accounts to your existing Sage 200 user accounts in the Manage Users list.
A new Sage 200 user account is created for any windows user accounts that are not matched to an existing Sage 200 user account.
You can use the Self Service website to access Sage 200 data using workspaces, enter timesheets and expense claims, and authorise purchase orders via a web browser.
Note: Authorising purchase orders in the Self Service web application replaces the previous Sage 200 Remote Authorisation application.
To set up web users:
Select the Is Web User option in the user Properties for each user who will access the Self Service website.
For timesheet and expense claims, create resource records for the users in Sage 200 Project Accounting.
All users who enter timesheets and expense claims using Self Service must have a Sage 200 user account which is assigned to a resource in Project Accounting.
Open: Sage 200 > Project Accounting > Project Maintenance > Resources.
Add the resource to the hierarchy.
Open: Sage 200 > Project Accounting > Project Maintenance > Resources.
Open: Sage 200 System Administration > Add-Ons.
Set up a user to access Sage 200 windows within Sage 200 CRM.
If your CRM users do not need to access the Sage 200 desktop, select Remote Users Access Only for the role.
This prevents a Sage 200 licence being used when forms are launched from CRM.
Open: System Administration > Online Payments.
All available providers are listed in the Online Payments menu within the navigation bar.
Sage Pay is the default payment service provider used by Sage 200.
A vendor accountThe Sage 200 account that links with the online payment service provider account. identifier accompanies every payment transaction made with the online payment service provider.
Open: System Administration > Online Payments > Vendor Accounts.
Open: Accounting System Manager > Settings > Merchant Account Settings.
Open: Sales Ledger > Ledger Set Up > Ledger Settings | Options.
Open: Sales Order Processing > System Set Up > SOP Settings | Order Entry.
There are a number of tasks in the purchase order authorisation process.
You need to decide which of your Sage 200 users has access to each purchase order authorisation task. A single Sage 200 user could have access to none, some, or all of these tasks. This helps to make sure that your authorisation process works smoothly and securely.
You can use the Messaging options to send email messages automatically when purchase orders require authorisation in Sage 200 Accounts.
Once set up, an email is sent to the Sage 200 user specified as the authoriser of a purchase order. Another email is sent to the Sage 200 user specified as the originator of the order.
If you want to send email notifications with your purchase orders, you must:
You can allow Sage 200 users who are specified as authorisers of purchase orders, to authorise their purchase orders outside of Sage 200 Accounts, via the self Service website.
To allows users to authorise purchase orders remotely:
Select the Is Web User option on each authorise's sage 200 user account.
Setting up the integration is done using the following steps:
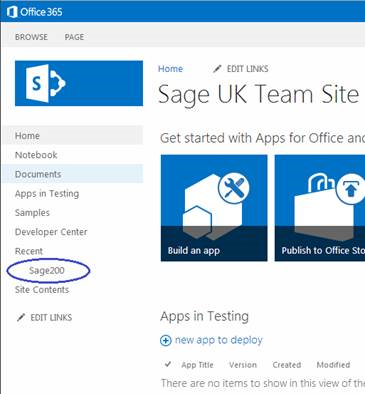
Note: Do not include any spaces in the name Sage200.
https://<companyname>.sharepoint.com/_layouts/15/appregnew.aspx
Note: If you are not logged on to Office365, log on when requested to do so.
For On Premise deployments, this should include your server name and the port number of the website. By default, the port number is 10444.
For example, <Your Sage200 server machine name>:10444
For Sage 200 Onlineonline, this should include your site name and sage200online.com.
For example, <Your site name>.sage200online.com
For on premise, this would be:
https://<Your Sage200 server machine name>:10444/Sage200SelfService/Office365/
For online, this would be:
https://<Your site name>.sage200online.com/Sage200SelfService/Office365/
The Redirect URL takes the details and writes them to the config database and completes the operation.
Note: Keep a note of your Client ID, Client Secret, Title, App domain and Redirect URL so that you can enter this information into Sage 200 System Administration.
Open: Sage 200 System Administration > Office365 Integration.
Note: If you want to update application details, select the SharePoint URL displayed, right click and select Update Settings.
This is the secure link (using SSL - https) that you registered. For example:
https://<companyname>.sharepoint.com/
Open: System Administration > Office365 Integration.
https://<companyname>.sharepoint.com/_layouts/15/appinv.aspx
Note: You must use a secure SSL - https, not http.
Note: This is the Client ID in SharePoint Online.
The application fields are populated. If they are not, check that you have entered the Application ID correctly.
<AppPermissionRequests AllowAppOnlyPolicy="true">
<AppPermissionRequest Scope="http://sharepoint/content/sitecollection" Right="Write" />
</AppPermissionRequests>
This is something that your Business Partner can do for you.
Within Sage ERP Online Services, the Business Partner will be able to fetch the connection string to the database and enter this string into Sharepoint Administrative Tools.
To connect workspaces with third party data sources, you must define the communication path.
Workspaces will only work if the communication path between the Workspace Designer and the company is defined. This is done by means of a modelModels are data schemas that describe how the information held in a particular database can be accessed and displayed within Sage 200. Each model is contained in its own dynamic link library (dll). and a data sourceThe origin of the information being included in the Sage 200 suite. This includes the location of the information on the server..
Models for Sage 200 Accounts, Sage 200 CRM and Sage 200 Manufacturing are set up by default.
A data source is set up by default for Accounts and CRM. The Manufacturing models use the Accounts data source.
If you want to use additional models and data sources, you must:
Add a model.
Note: You can design your own workspaces to talk to Sage 200 or to third party data sources if you are a user who Can Edit Workspaces. This lets you use the Workspace Designer to design workspaces.
Tip: For the most recent version of this topic, please see our help website here.